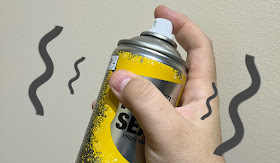
Now I hear what you're saying. "Purity seal is terrible! It's not even in stock anymore! Why would you waste time creating a tutorial for this?", and to that I say... fair point. However, I know there are some hobbyists out there with a can or two of this stuff knocking about gathering cobwebs as the fear of misty models creeps ever further into their psyche. More over there may very well be similar cans of matte spray varnish still amongst the masses, biding their time to completely ruin whatever projects you have been pouring your blood, sweat and tears into.
Well it may surprise you that (almost) every model in my Necron army has been coated with a layer of purity seal with no misting whatsoever with only some very minor (but typical for spray varnish) cosmetic changes to my models - though in fairness I quite like the effect it has on my paint job. So how did I stop my models from turning white you ask? Well there are three very simple steps I follow before using the spray.
Step 1. Warm up your can
Someone with a much more scientific mind than mine will be able to tell you exactly what it is about how cold varnish that creates a misting effect, though it is likely akin to why we try to avoid undercoating miniatures when it's cold.
Do not (and I cannot stress this enough) put cans on very hot surfaces like radiators! Your varnish doesn't need to be that warm and you run the risk of the can exploding if the surface is too hot. Instead it's best to spend 5 minutes placing the can either between your legs or under your armpit (yes, really). These are the warmest of the accessible areas of our body and after a little time they will warm up your can enough to help stop the stuff from misting up your models.
Step 2. Shake your can thoroughly
The less your varnish is mixed the more likely it is to go horribly wrong when your spray your miniature. To avoid the loss of an excellent paint job, be sure to fight the ache in your shoulder and shake the can for at least a minute before you initiate spraying. This ensures that all the carefully formulated chemicals that have likely been sitting there stagnant for a while don't remain separated from each other after sitting in the cupboard for weeks, months or even years.
Step 3. Use a hairdryer
This is probably the single best tip in this article and one you most likely won't see very often. Use a hairdryer to dry the varnish. Do not use the hairdryer's highest heat option (if it has one) but use a warm setting as this will work well with step 1's tip of keeping the varnish warm. What this does is dries the varnish before the chemicals in the formula can perform any mistifying weirdness on your paint job. It also gives you less waiting time to do any post-varnish work you have left to do (for me that's repainting the rims of my bases and gloss varnishing).
And that's it, it really is as simple as that! Do let me know how you get on with these tips in the comment below if you actually have a can of Purity Seal you're looking to use up, or if there are any other tutorials like this that you'd like to see in the future please let me know that too!
- D J Driver

.jpg)


No comments:
Post a Comment