
Battle Report: Etheral Spear vs Khertet Dynasty

PROLOGUE
Amongst the myriad of factions vying for power and dominion within the ever turbulent Orberus Sector, the Ethereal Spear, whilst commonly believed to have aligned themselves with the forces of the Imperium, appear to have loftier goals as befits the nature of their Aeldari heritage. Whilst the Necrons, Imperium and various Chaos warbands fight one another for ownership of the various planets scattered throughout the system, the Ethereal Spear utilise the turmoil this war has created to launch surgical strikes against the key players in the Nephilim Wars, with the Khertet Dynasty high on their list of targets.
With the vanguard of the Dynasty's assets currently fighting the Onderghast Crusade over on Perelus, the Ethereal Spear take advantage of the Khertet nobility's absence and attack one of the Legion of Silence's major strongholds on Python IV, however the Phaeron Nemekh the Summoner was not so foolish as to leave a site of such import unguarded. Led by the insidious Baltha'Zyr the Enslaver and his recently revived rival Peletesz the Wretched, the two Technomancers awaken their tomb's Canoptek contingency as well as several other reserve troop units to repel the invading Aeldari and protect the quantum shielding nodes they have been tasked with safeguarding...
THE ARMY LISTS
The Khertet Dynasty
Detachment: Canoptek Court
- Warlord
- Wargear: Staff of Light
- Enhancement: Metalodermal Tesla Weave
- Wargear: Staff of Light
- Wargear: Plasmic Lance
- Weapon Modifiers: Plasmic Lance - +1 BS, +1 Attack
- Battle Scar: Fatigued (Crusade Core Rules)
- Wargear: 20 x Gauss Flayers
- Wargear: 10 x Tesla Carbines
- Battle Traits: Undying Revenants (Necron Codex), Will to Serve (Necron Codex)
- Wargear: 3 x Feeder Mandibles
- Wargear: 3 x Feeder Mandibles
- Wargear: 2 x Atomiser Beams
- Battle Traits: Optimised Aggressor
- Wargear: Doomsday Blaster
- Battle Traits: Self-Replicator Nodes (Necron Codex)
- Weapon Modifiers: Doomsday Blaster - +1 BS, +1 Damage
- Wargear: 3 x Vicious Claws, 3 x Particle Casters
- Warlord
- Wargear: Star Glaive, Dragon Fusion Gun
- Battle Trait: Lead from the Front (Crusade: Pariah Nexus)
- Wargear: Singing Spear, Shuriken Pistol, Twin Shuriken Catapult, Eldritch Storm
- Wargear: 9 x Shuriken Cannons
- Battle Traits: Blur of Speed (Crusade: Pariah Nexus), Saddleborne Assassins (Crusade: Pariah Nexus)
- Wargear: 4 x Reaper Launchers, 1 x Tempest Launcher
- Wargear: 5 x Ranger Long Rifles, 5 x Shuriken Pistols
- Wargear: Brightlance, Shuriken Catapult
- Weapon Modifiers: Brightlance - +1 AP, +1 Attack
- Wargear: Brightlance, Pulse Laser, Shuriken Cannon
- Wargear: Lynx Pulsar, Brightlance
- Weapon Modifiers: Lynx Pulsar - +1 AP, +1 Damage
- Weapon Modifiers: Brightlance - +1 AP, +1 Attack
PREGAME SET UP
Unlike my game against the Onderghast Crusade that I had reported on the other month, this game was not an official flashpoint and as such had no predetermined mission or strategic footings, something I have allowed in the campaign as we are not restricting ourselves to the standard phase campaign model that is outlined in the Pariah Nexus book, and I never got to play against this army in the last campaign so we both felt this match up was overdue. Because of this we chose our strategic footing in secret on the day as well as randomly selecting the mission. I chose a defensive footing whilst my opponent selected an aggressive footing.
For the mission we rolled "Quantum Siege" which honestly fit the narrative I had in mind perfectly, with the Aeldari besieging a Necron stronghold and Canoptek constructs emerging from the depths to defend their masters forces, and as our strategic footing choices put me as the Defender it all worked out marvelously. There was a slight change we agreed upon in the mission details in that we decided that players need to control an objective they wish to enable/disable the quantum shielding on as opposed to not controlling it as I could have easily just stepped away from objectives and won the game by forcing my opponent to control any eligible objectives for them to disable, and that just posed no challenge - more over, it made no sense to either of us.
When it came down to declaring the detachments each player would use and which characters would be attached to which units, my opponent had the incredibly difficult decision of attaching his Farseer Windrunner to his Windrunners, and the Autarch operated alone as there were no viable units for him to attach to. For the Necrons I decided to run with my favourite combo of Plasmancer/Immortals, then I placed Peletesz the Wretched with my unit of Wraiths and Baltha'Zyr the Enslaver with my Necron Warriors, reasoning my opponent was more likely to charge my Warriors than my Wraiths.
For agendas, I had gone for "Territorial Imperative" from the Necrons codex as well as the strategic footing specific "Hold Steady" to represent my Necrons objective of holding on to their territory. My opponent likewise taking the narrative route of "I'm here to kill you and destroy your land" aptly took the agendas "King Slayer" and "Reap A Tally". Whilst I did start the game with more Crusade Points than my opponent, it was not quite enough for them to be blessed with a Crusade Boon much to my relief.
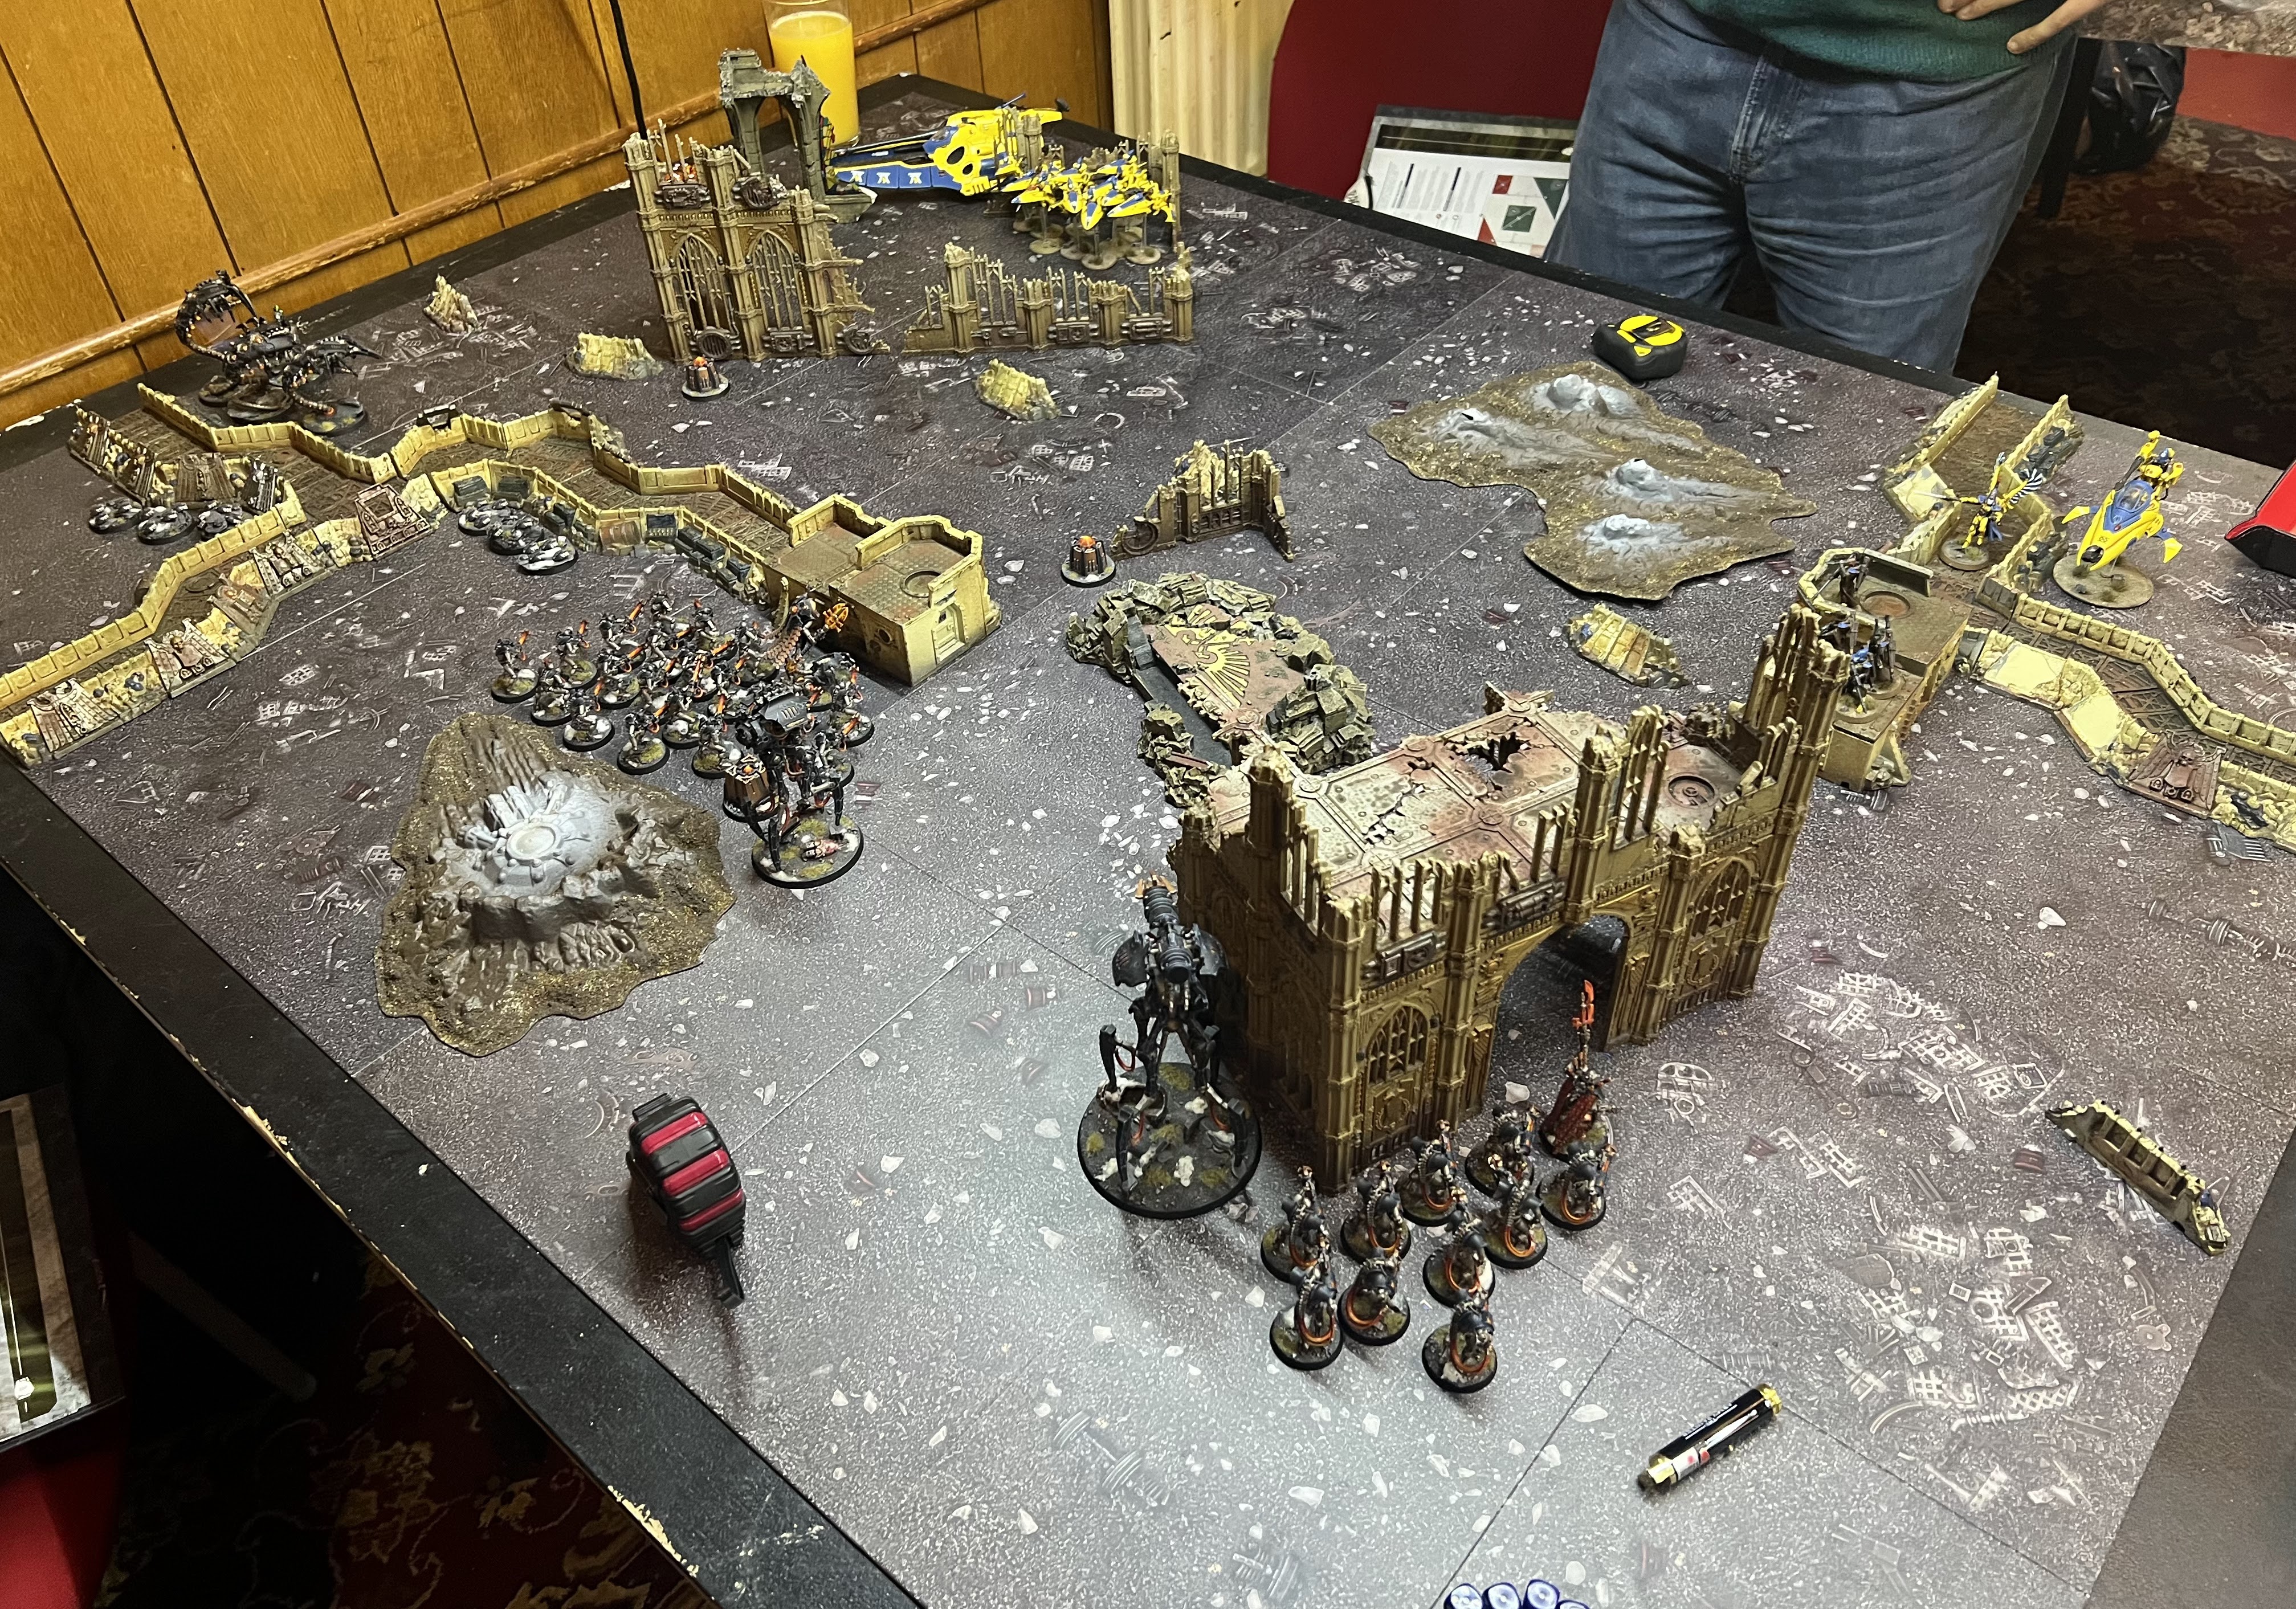
The Ethereal Spear deployed in a two prong, pincer formation with the Hunter in the Dark and the Tip of the Spear on the army's right flank and Cynbarril, the Unseen Wind and the Sun's Gaze on the left flank. whilst the Reflection of Khaine was set up with the Silent Breath in strategic reserve. Meanwhile for the Khertet Dynasty, the Harbingers of Destruction and the Hellfire Spyre were set up in waiting behind a ruin, with Scarabs and Wraiths on the left flank ready to sweep around (mainly because I didn't want my opponent's rangers to snipe my Wraith Technomancer) and the Venom Repulsion Decurion guarding the home objective with Karrep the Nightstalker nearby to help replenish their numbers.
Once all was set up, it was time to decide on turn order... though I must make a disclaimer and give an apology to my opponent. The scenario did specifically state "Attacker goes first" and my opponent did say that's what they believed was the case, then I reread it and somehow missed it in front of me, so I did end up going first but it was unjust and I sincerely apologise!
BATTLE ROUND 1
Routing out the Lynx stalking the ruins, Peletesz the Wretched surged forward with his Canoptek Wraith creations towards the Aeldari tank, peppering it with particle shots and charging the wraithbone clad weapon of war, tearing several minor, but vital holes in its hull with their vicious claws. Meanwhile, on the other side of the battlefield, Rakantyr the Baleful and his retinue of Immortals emerged from behind their cover and rained down tesla fire against nearby Aeldari Rangers, but despite the raging tempest that came their way a single Ranger was able to survive thanks to their cover. In a fit of rage, living fire shot from Rakantyr's necrodermal body and struck the nearby Viper, searing the light vehicle with eldritch flame.
 |
| The Wraiths move towards the Lynx |
The Aeldari retaliation was fittingly swift and less fittingly brutal. The Iyanden Windrunners, led by their Farseer emerged from the ruins and showered the opposing Necron Warriors with shuriken fire, destroying the entire unit in one fell swoop alongside their leader, Baltha’Zyr the Enslaver and leaving the Necron home objective completely unguarded. The nearby Lynx flies over the Wraiths in favour of getting a better line of sight against the Necron backfield but fails to do any lasting damage. The Windrunners charge the Scarab Swarm and wipe the unit whilst only sustaining minimal damage themselves.
 |
| The Skyrunners swarm the Scarabs |
BATTLE ROUND 2
Determined to clear the right flank, the Immortals let loose the full might of their Tesla Carbines at Cynbarril, felling the Winged Autarch in a single volley, whilst Rakantyr the Baleful directs his living fire and staff at the Viper, reducing the Aeldari light vehicle to a single wound before the entire unit charges the lone Ranger, destroying the xenos sniper. The Canoptek Wraiths renew their charge against the Lynx and shave a few wounds off of it whilst the Canoptek Reanimator lurches forward to protect the center objective.
 |
| Cynbarril charges towards a barrage of tesla fire |
The Aeldari Deep Strike their Wave Serpent onto the Necron backfield objective, releasing their Dark Reapers who deactivate the Necron shield generator before inflicting serious damage on the nearby Immortals. The Aeldari Windrunners then set their sights on the Canoptek Wraiths, and through overwhelming shuriken fire, shred the constructs into nothing along with their commanding Technomancer, Peletesz the Wretched before deactivating the nearby generator. Meanwhile the Lynx moves even further towards the Necron backline and unleash fire against the Canoptek Doomstalker but is only able to shave off a few wounds
 |
| The Wave Serpent touches down where the Warriors once stood |
BATTLE ROUND 3
The Immortals alongside Karrep the Nightstalker blast all but two Dark Reapers away whilst Rakantyr the Baleful directs his living fire into the Viper and lance into the Wave Serpent, destroying the former and damaging the latter in the maelstrom. The Doomstalker meanwhile blasts the Lynx, removing the threat for good before charging the remaining Dark Reapers but fails to kill it this time around.
 |
| The Doomstalker prepares to assault the Dark Reapers |
The Windrunners deactivate the nearby shield generator and unleash a hail of shuriken fire onto the Reanimator. It survives, but is subsequently charged and brought down to a single wound. The last of the remaining Dark Reapers, however, bite the dust under the Doomstalker’s giant limbs.
LAST TWO BATTLE ROUNDS
Realising the hopeless situation it found itself in, the Reanimator attempts a desperate escape but, despite the use of a Command Reroll, it fails two tests in a row and is completely destroyed. The Doomstalker subsequently opens fire on the Windrunners after reactivating the nearby shield generator, but fails to do enough damage to prevent them from obliterating the Immortals and leaving the Aeldari jetbikes free to deactivate the remaining two shield generators over the last couple of turns before the game ended, leaving the Windrunners and the Doomstalker the last remaining units on the battlefield.
 |
| The Skyrunners revel in victory |
ETHEREAL SPEAR VICTORY!
80 VP - 45 VP
POSTGAME ANALYSIS

No comments